LED INTERFACING WITH AVR
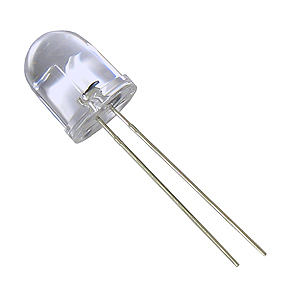
A light-emitting diode (LED) is a semiconductor device that emits visible light when an electric current passes through it.
Synopsis

In this tutorial we will learn how make a simple LED blinking project using an Atmega16 microcontroller. The Atmega16 belongs to the AVR microcontroller family. In this we will connect 9 LEDs to PORTA of Atmega16 microcontroller. ATmega16 has 32 I/O pins to communicate with external devices.

Description

A light-emitting diode (LED) is a semiconductor device that emits visible light when an electric current passes through it. The light is not particularly bright, but in most LEDs it is monochromatic, occurring at a single wavelength.

To limit the current in the LED to a safe value one resistor will be connected in series with LED.

Resister value calculation

The value of resistance R can be calculated the equation, using R= (V-Vd)/Id

Where, V  input voltage

Vd LED voltage

Id LED current

R= (V-1.7)/10 mA

Since most of the controllers work on 5V, so substituting V= 5V, the value of resistance comes out to be 330 ohm. The resistance 220 ohm, 470 ohm is commonly used substitute in case 330 ohm is not available.

ATmega16 has 16 KB programmable flash memory, static RAM of 1 KB and EEPROM of 512 Bytes. The endurance cycle of flash memory and EEPROM is 10,000 and 100,000, respectively. It is a 40 pin microcontroller. There are 32 I/O (input/output) lines which are divided into four 8-bit ports designated as PORTA, PORTB, PORTC and PORTD. ATmega16 has various in-built peripherals like USART, ADC, Analog Comparator,  SPI,  JTAG etc. Each I/O pin has an alternative task related to in-built peripherals.

Microcontrollers uses oscillator (a quartz crystal) which can produce a constant square wave to provide the synchronization of everything on the chip. Each rising edge of the square wave allows an operation to take place such as loading instructions executing place such as loading instructions, executing instructions, and saving results. Input and Output ports are the way the uC interfaces with other components.  Each port contains 8 pins. Ports can be input only output only or bi-directional. The ATmega16 has all bi-directional ports. Bi-directional ports means they have the capability to be both, but you must choose one or the other at any given time.

Proteus design for LED interfacing with AVR


Orcad design for LED interfacing with AVR


LED interfacing with AVR

/*  Name     : Main.c
 *  Purpose  : Source code for LEDs Interfacing with ATMEGA16.
 *  Author   : GEMICATES
 *  Date     : 04-07-2017
 *  Website  : www.gemicates.org
 *  Revision : None
 */

#include<avr/io.h>			// Header File for ATMEGA16
#include<util/delay.h>	                // Include Delay Function

#define LEDS PORTA			// To Set Port A as Output
#define L1 PB0				// To Set Port B pin 0 as Output
#define L2 PD7				// To Set Port D pin 7 as Output
#define SW PD0				// To Set Port D pin 0 as Input

                                        // MAIN FUNCTION 
void main()
{
	DDRA =0xff;		        // Set the Data Direction Register A as Ouput
	DDRB =0x01;			// Set the Data Direction Register B Pin 0 as Ouput
	DDRD =0x80;			// Set the Data Direction Register D Pin 7 as Ouput & Pin 0 as Input
	PORTD=0x01;			// Enable the Pullup Resistor for Switch
while(1)				// Infinite loop
  {

	LEDS=0x00;			// Enable the PortA Pins
	PORTB =~(1<<L1);		// Enable the PortB Pin 0
	_delay_ms(500);			// Make Delay
	LEDS=0xff;			// Diable the PortA Pins
	PORTB =(1<<L1);			// Enable the PortB Pin 0
	_delay_ms(500);			// Make Delay


	if (PIND == 1) 			// Check Switch Position
		{
		  PORTD =(1<<L2);	// If Switch is ON LED Connected to the pin PD7 will Enable
		  _delay_ms(500);	// Make Delay
		  PORTD =0;		// Disable the Pin PD7
		  _delay_ms(500);	// Make Delay
		}
  }
}

Error message here!

Show Error message here!


Forgot your password?

Error message here!

Send OTP

Error message here!

Show Error message here!


Lost your password? Please enter your email address. You will receive a password you Need.

Send Error message here!


Back to log-in

Close